Disabling checkpoints in Hyper-V
By default in Windows 10, Hyper-V creates checkpoints for a virtual machine when you start it up. This lets you easily revert the virtual machine to its previous state should you need to do so. While this is useful, this process can be time-consuming as the checkpoint file (.avhdx) which stores all the changes made in the current session has to be merged with the virtual drive (.vhdx) after the VM has shut down. If this process does not complete successfully, then it can cause the whole virtual drive to become corrupted.
Solution
If you don't need to be able to revert to a previous state of the machine from before you started it up, then you can disable the checkpoints feature in Hyper-V on virtual machine level.
- Open the Hyper-V Manager on the machine where the virtual machine is running
- Right-click on the virtual machine you want to disable checkpoints for and click Settings...
- Go to Checkpoints in the left pane and uncheck the Enable checkpoints checkbox in the right:
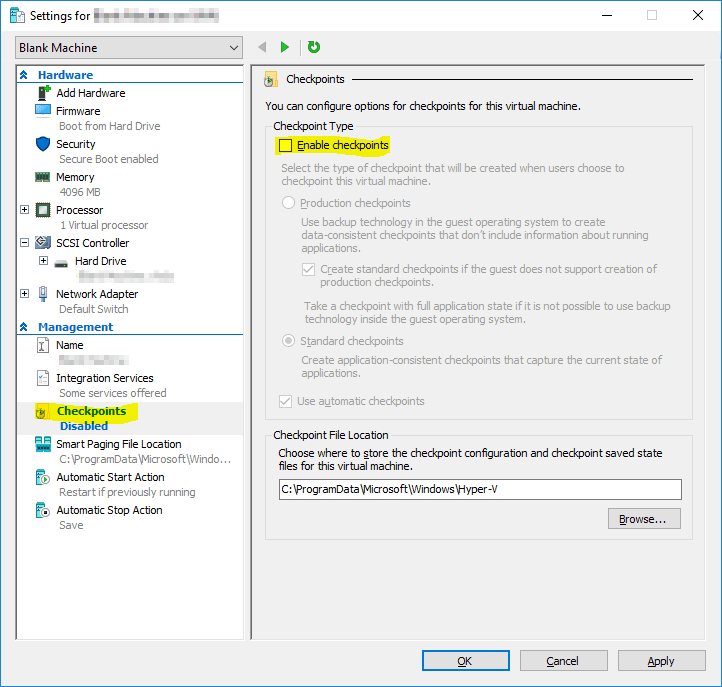
- Click OK to apply the changes to the virtual machine
Conclusion
That should fix any issues you might have with virtual disks becoming corrupt because they're not able to merge properly. Do note that you now lose all the benefits of having all the changes that you do in the VM stored in a separate file, however, if you never used the revert feature (I never found myself using it) then it shouldn't be a problem. Let me know in the comments if you have any issues or questions.