Introduction to Aspect-Oriented Programming (AOP) in .NET with Autofac Interceptors
I recently worked on some of our backend .NET Core services. While implementing some functions, I found myself writing repetitive code to log function calls. These logs would allow us to trace the execution of a function if necessary. The problem was the logging calls were creating hard-to-read code. So, I set out to find a better way of logging.
The Discovery of Aspect-oriented Programming (AOP)
While researching, I stumbled across a potential solution: Aspect-oriented Programming (AOP). I would try and explain the concept, but I found that the first paragraph on Wikipedia does an excellent job of doing so:
In computing, aspect-oriented programming (AOP) is a programming paradigm that aims to increase modularity by allowing the separation of cross-cutting concerns. It does so by adding additional behavior to existing code (an advice) without modifying the code itself, instead separately specifying which code is modified via a "pointcut" specification, such as "log all function calls when the function's name begins with 'set'". This allows behaviors that are not central to the business logic (such as logging) to be added to a program without cluttering the code core to the functionality.
– Aspect-oriented programming, Wikipedia (accessed 17 July 2021)
This seemed like the perfect solution to my problem! I could create a logging aspect responsible for all generic logging across all my methods. This would save me having to write the same repetitive logic every time.
There was one problem however: .NET doesn't seem to natively support AOP (at least when I was researching). The only viable solutions I could find were:
- Modifying the DLLs post-build using a solution like PostSharp or
- Using an interceptor with an IoC container like Castle Windsor or Autofac
Determined not to complicate the build process with a solution like PostSharp, I decided to go with the second option: using an interceptor with an IoC container.
What is Autofac?
Before diving in, you might be asking yourself what Autofac is. Autofac is an Inversion of Control (IoC) container for .NET, .NET Core and .NET Framework (all the platforms). It allows you to write more maintainable code by making it easy to create loosely coupled services that don't depend on each other directly but by retrieving the implementation for dependent services from a central "container" when being created/referenced. This "container" is Autofac.
If you would like to find out more about Inversion of Control, you can read more about it at Microsoft Docs. You can also learn more about Autofac (and fall in love with their adorable mascot) on the Autofac website.
What are Interceptors?
A crucial feature that Autofac supports is Interceptors. They allow you to inject logic before and after method calls to resolved services. This means that we can add logging functionality to a method in a service without ever having to modify the service or method! Instead, we tell Autofac to intercept all calls to methods in a particular class with a LoggingInterceptor. This LoggingInterceptor then takes every call to a service method and logs it along with whether it was successful or if exceptions were thrown.
Now I should mention that Interceptors can be used for much more than just logging. You can also use them for access control to methods by preventing a method from being executed if the user is not authorized to execute it. There are many different use cases, but for this example, we will be focusing on logging.
Practical Example
Without further ado, let's get started with a practical example!
We will create a simple Console application in .NET Core 3.1 to demonstrate intercepting calls to a service using Autofac to log those calls.
1. Creating the project
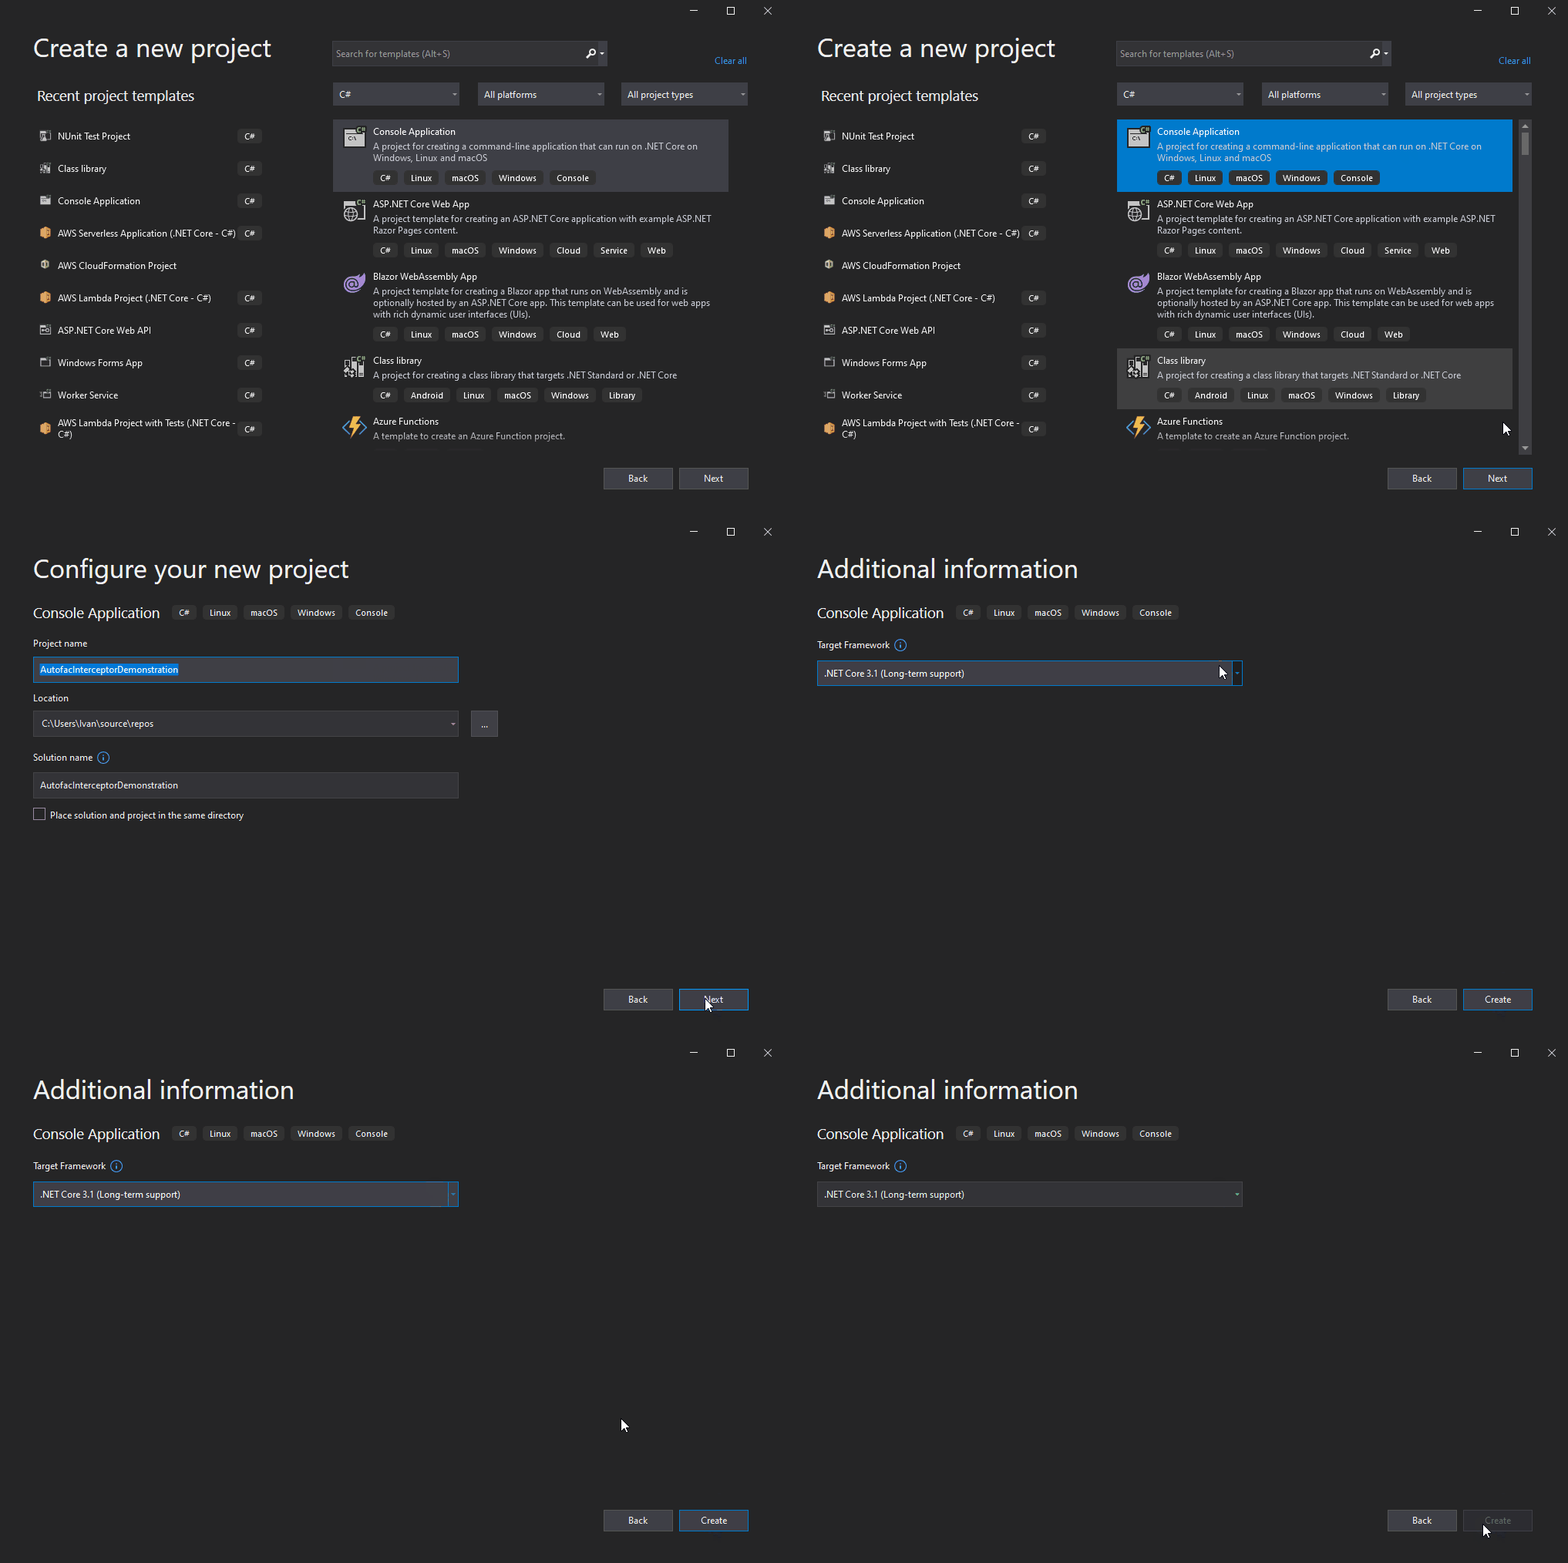
I will first create a .NET Core 3.1 Console application in Visual Studio 2019.

2. Install the necessary Nuget packages
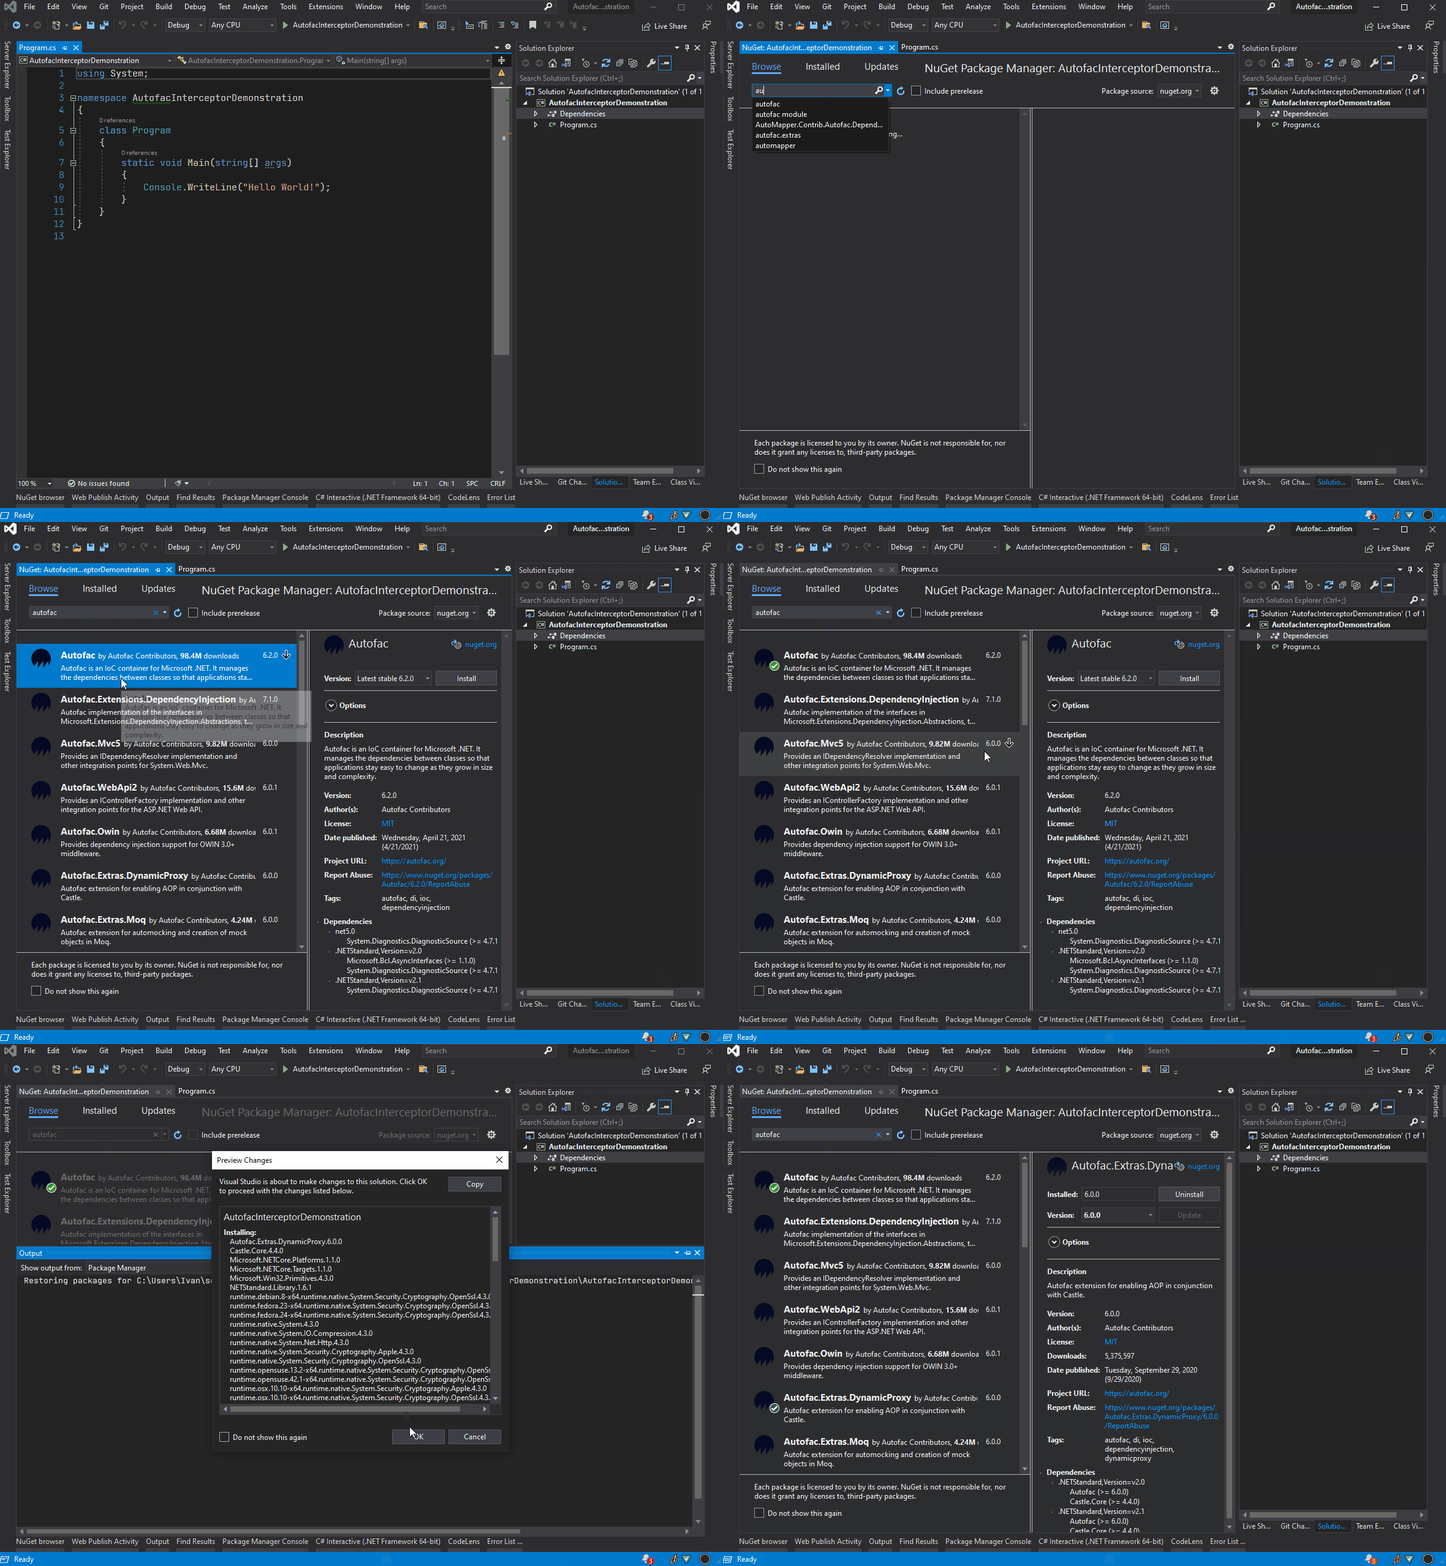
To use Interceptors with Autofac, there are a few Nuget packages that we will need to install on the newly-created project:
- Autofac
The base library for using Autofac. At the time of writing this, I am installing version 6.2.0 - Autofac.Extras.DynamicProxy
The library that allows us to use interceptors with Autofac. This package will also install Castle.Core which contains the dynamic proxy functionality required for the interception. At the time of writing this, I am installing version 6.0.0

3. Creating a sample service
For this example, we are going to create a simple service for this demonstration. It will consist of an interface defining what methods the service should expose and then a class implementation.
Our service is going to be a label maker. The interface for our label maker will look like the following:
Services/ILabelMaker.cs
namespace AutofacInterceptorDemonstration.Services
{
    public interface ILabelMaker
    {
        /// <summary>
        /// Prints the specified string contents on a label.
        /// </summary>
        /// <param name="contents">The contents to be printed.</param>
        void Print(string contents);

        /// <summary>
        /// Calculates the estimated label dimensions.
        /// </summary>
        /// <param name="contents">The contents that will be printed on the label.</param>
        /// <returns>The estimated dimensions of the label.</returns>
        (int width, int height) CalculateLabelSize(string contents);
    }
}
We can now write an implementation that will simply print labels to the Console. This implementation will reference the ILabelMaker interface that we created previously.
Services/ConsoleLabelMaker.cs
using System;
using System.Linq;
using System.Text;

namespace AutofacInterceptorDemonstration.Services
{
    public class ConsoleLabelMaker : ILabelMaker
    {
        /// <summary>
        /// Prints the specified text onto a label on the Console.
        /// </summary>
        /// <param name="contents">The contents to be printed.</param>
        public void Print(string contents)
        {
            var dimensions = CalculateLabelSize(contents);

            var contentLines = contents.Split(Environment.NewLine);

            var sb = new StringBuilder();
            sb.AppendLine($"+{new string('-', dimensions.width - 2)}+");

            foreach (var line in contentLines)
                sb.AppendLine($"| {line.PadRight(dimensions.width - 4)} |");

            sb.AppendLine($"+{new string('-', dimensions.width - 2)}+");

            Console.WriteLine(sb.ToString());
        }

        /// <summary>
        /// Calculates the estimated width and height of the label in the console.
        /// </summary>
        /// <param name="contents">The contents that would be printed.</param>
        /// <returns>The width and height estimation for the label.</returns>
        public (int width, int height) CalculateLabelSize(string contents)
        {
            var contentLines = contents.Split(Environment.NewLine);

            var width = contentLines.Max(x => x.Length) + 4;
            var height = contentLines.Length + 2;

            return (width, height);
        }
    }
}
4. Building our Autofac container
Now that we have a service, we are going to create an Autofac container and register the ILabelMaker interface and ConsoleLabelMaker implementation. Then, once our container is running and everything works, we will then create an interceptor and configure it with our Autofac container.
Program.cs
using System;
using Autofac;
using AutofacInterceptorDemonstration.Services;

namespace AutofacInterceptorDemonstration
{
    class Program
    {
        static void Main(string[] args)
        {
            var container = BuildContainer();

            // Create a lifetime scope which we can use to resolve services
            // https://autofac.readthedocs.io/en/latest/resolve/index.html#resolving-services
            using var scope = container.BeginLifetimeScope();

            var labelMaker = scope.Resolve<ILabelMaker>();

            // Prompt the user for label contents
            Console.Write("Please enter label contents: ");
            var contents = Console.ReadLine();

            // Output dimensions
            var dimensions = labelMaker.CalculateLabelSize(contents);
            Console.WriteLine($"Label size will be: {dimensions.width} x {dimensions.height}");

            // Print the label
            labelMaker.Print(contents);
        }

        /// <summary>
        /// Builds an Autofac container with the necessary services.
        /// </summary>
        /// <returns>
        /// Autofac container that can be used to resolve services.
        /// </returns>
        private static IContainer BuildContainer()
        {
            var builder = new ContainerBuilder();

            // Register our label maker service as a singleton
            // (so we only create a single instance)
            builder.RegisterType<ConsoleLabelMaker>()
                .As<ILabelMaker>()
                .SingleInstance();

            return builder.Build();
        }
    }
}
If we run this program, we will get the following input:
Please enter label contents: Introduction to Autofac Interceptors
Label size will be: 40 x 3
+--------------------------------------+
| Introduction to Autofac Interceptors |
+--------------------------------------+
That's working as expected and we're getting the desired output, so we'll now go and add a logging interceptor to log those calls to the label maker service.
5. Creating our interceptor
For us to create our own interceptor, we need to create a class that implements the IInterceptor interface. We then implement our custom logic that we want to run before and after invoking a method.
In this demonstration, we will simply log the method calls to the Console (however you should wire this up to a logging library like Serilog, NLog or something similar).
Interceptors/LoggingInterceptor.cs
using System;
using System.Linq;
using Castle.DynamicProxy;

namespace AutofacInterceptorDemonstration.Interceptors
{
    public class LoggingInterceptor : IInterceptor
    {
        /// <inheritdoc />
        public void Intercept(IInvocation invocation)
        {
            Console.WriteLine($"Executing {invocation.Method.Name} with parameters: " +
                              string.Join(", ", invocation.Arguments.Select(a => a?.ToString()).ToArray()));

            // Invoke the method
            invocation.Proceed();

            Console.WriteLine($"Finished executing {invocation.Method}");
        }
    }
}
6. Wiring up our interceptor
Once we've created our LoggingInterceptor, we simply need to wire it up to our Autofac container while we are building it.
See the modifications in the snippet below:
Program.cs
using System;
using Autofac;
using Autofac.Extras.DynamicProxy;
using AutofacInterceptorDemonstration.Interceptors;
using AutofacInterceptorDemonstration.Services;

namespace AutofacInterceptorDemonstration
{
    class Program
    {
    	// ...
        private static IContainer BuildContainer()
        {
            var builder = new ContainerBuilder();

            // First register our interceptors
            builder.RegisterType<LoggingInterceptor>();

            // Register our label maker service as a singleton
            // (so we only create a single instance)
            builder.RegisterType<ConsoleLabelMaker>()
                .As<ILabelMaker>()
                .SingleInstance()
                .EnableInterfaceInterceptors()
                .InterceptedBy(typeof(LoggingInterceptor));

            return builder.Build();
        }
    }
}
When we now execute the program, we should see the following output:
Please enter label contents: Introduction to Autofac Interceptors
Executing AutofacInterceptorDemonstration.Services.ConsoleLabelMaker.CalculateLabelSize with parameters: Introduction to Autofac Interceptors
Finised executing AutofacInterceptorDemonstration.Services.ConsoleLabelMaker.CalculateLabelSize
Label size will be: 40 x 3
Executing AutofacInterceptorDemonstration.Services.ConsoleLabelMaker.Print with parameters: Introduction to Autofac Interceptors
+--------------------------------------+
| Introduction to Autofac Interceptors |
+--------------------------------------+

Finised executing AutofacInterceptorDemonstration.Services.ConsoleLabelMaker.Print
You can see that before and after every method call, we have logs indicating that the method execution has started/finished!
A note on intercepting classes directly without using interfaces
You will notice that when we register and access our service in the Autofac container, we used the class to retrieve the registered implementation. This is the best way to register services so that they can be intercepted.
However, it might not always be the case that a class has an interface that we can use to register it. If this is the case, Autofac does allow us to use class interception, however, it does require that all the methods in our class are marked as virtual so that it can intercept the calls.
If we removed the ILabelMaker interface and registered the ConsoleLabelMaker service directly (and marked all its methods as virtual), then we can register the interceptor as follows:
using System;
using Autofac;
using Autofac.Extras.DynamicProxy;
using AutofacInterceptorDemonstration.Interceptors;
using AutofacInterceptorDemonstration.Services;

namespace AutofacInterceptorDemonstration
{
    class Program
    {
    	// ...
        private static IContainer BuildContainer()
        {
            var builder = new ContainerBuilder();

            // First register our interceptors
            builder.RegisterType<LoggingInterceptor>();

            // Register our label maker service as a singleton
            // (so we only create a single instance)
            builder.RegisterType<ConsoleLabelMaker>()
                .SingleInstance()
                .EnableClassInterceptors()
                .InterceptedBy(typeof(LoggingInterceptor));

            return builder.Build();
        }
    }
}
Closing
I hope this article has shed some light on how you can implement Aspect-oriented Programming in .NET using Autofac. There are many valid use-cases for AOP - logging is just one of the more common use-cases! You could also create interceptors to measure execution time, enforce access control and much more.
You can find the code for this demonstration on GitHub.
If you have any questions or suggestions, please leave them in the comments below.